Take a Seat: What Makes a Bench Accessible (and Actually Enjoyable to Use)
Let’s be honest—sometimes a bench is more than just a bench. On a trail, it’s a sigh of relief, a place to take in the view, or a moment to share snacks with your hiking buddy. But if benches aren’t thoughtfully placed or designed, they can leave out a lot of people who could really use them. That’s where accessibility comes in, and yes, even benches have rules.
According to the Americans with Disabilities Act (ADA) and the Forest Service’s Outdoor Recreation Accessibility Guidelines (FSORAG), benches aren’t just “plop it wherever” pieces of furniture. They’re part of the bigger picture of making the outdoors welcoming to everyone. So let’s break down what makes an accessible bench actually work.
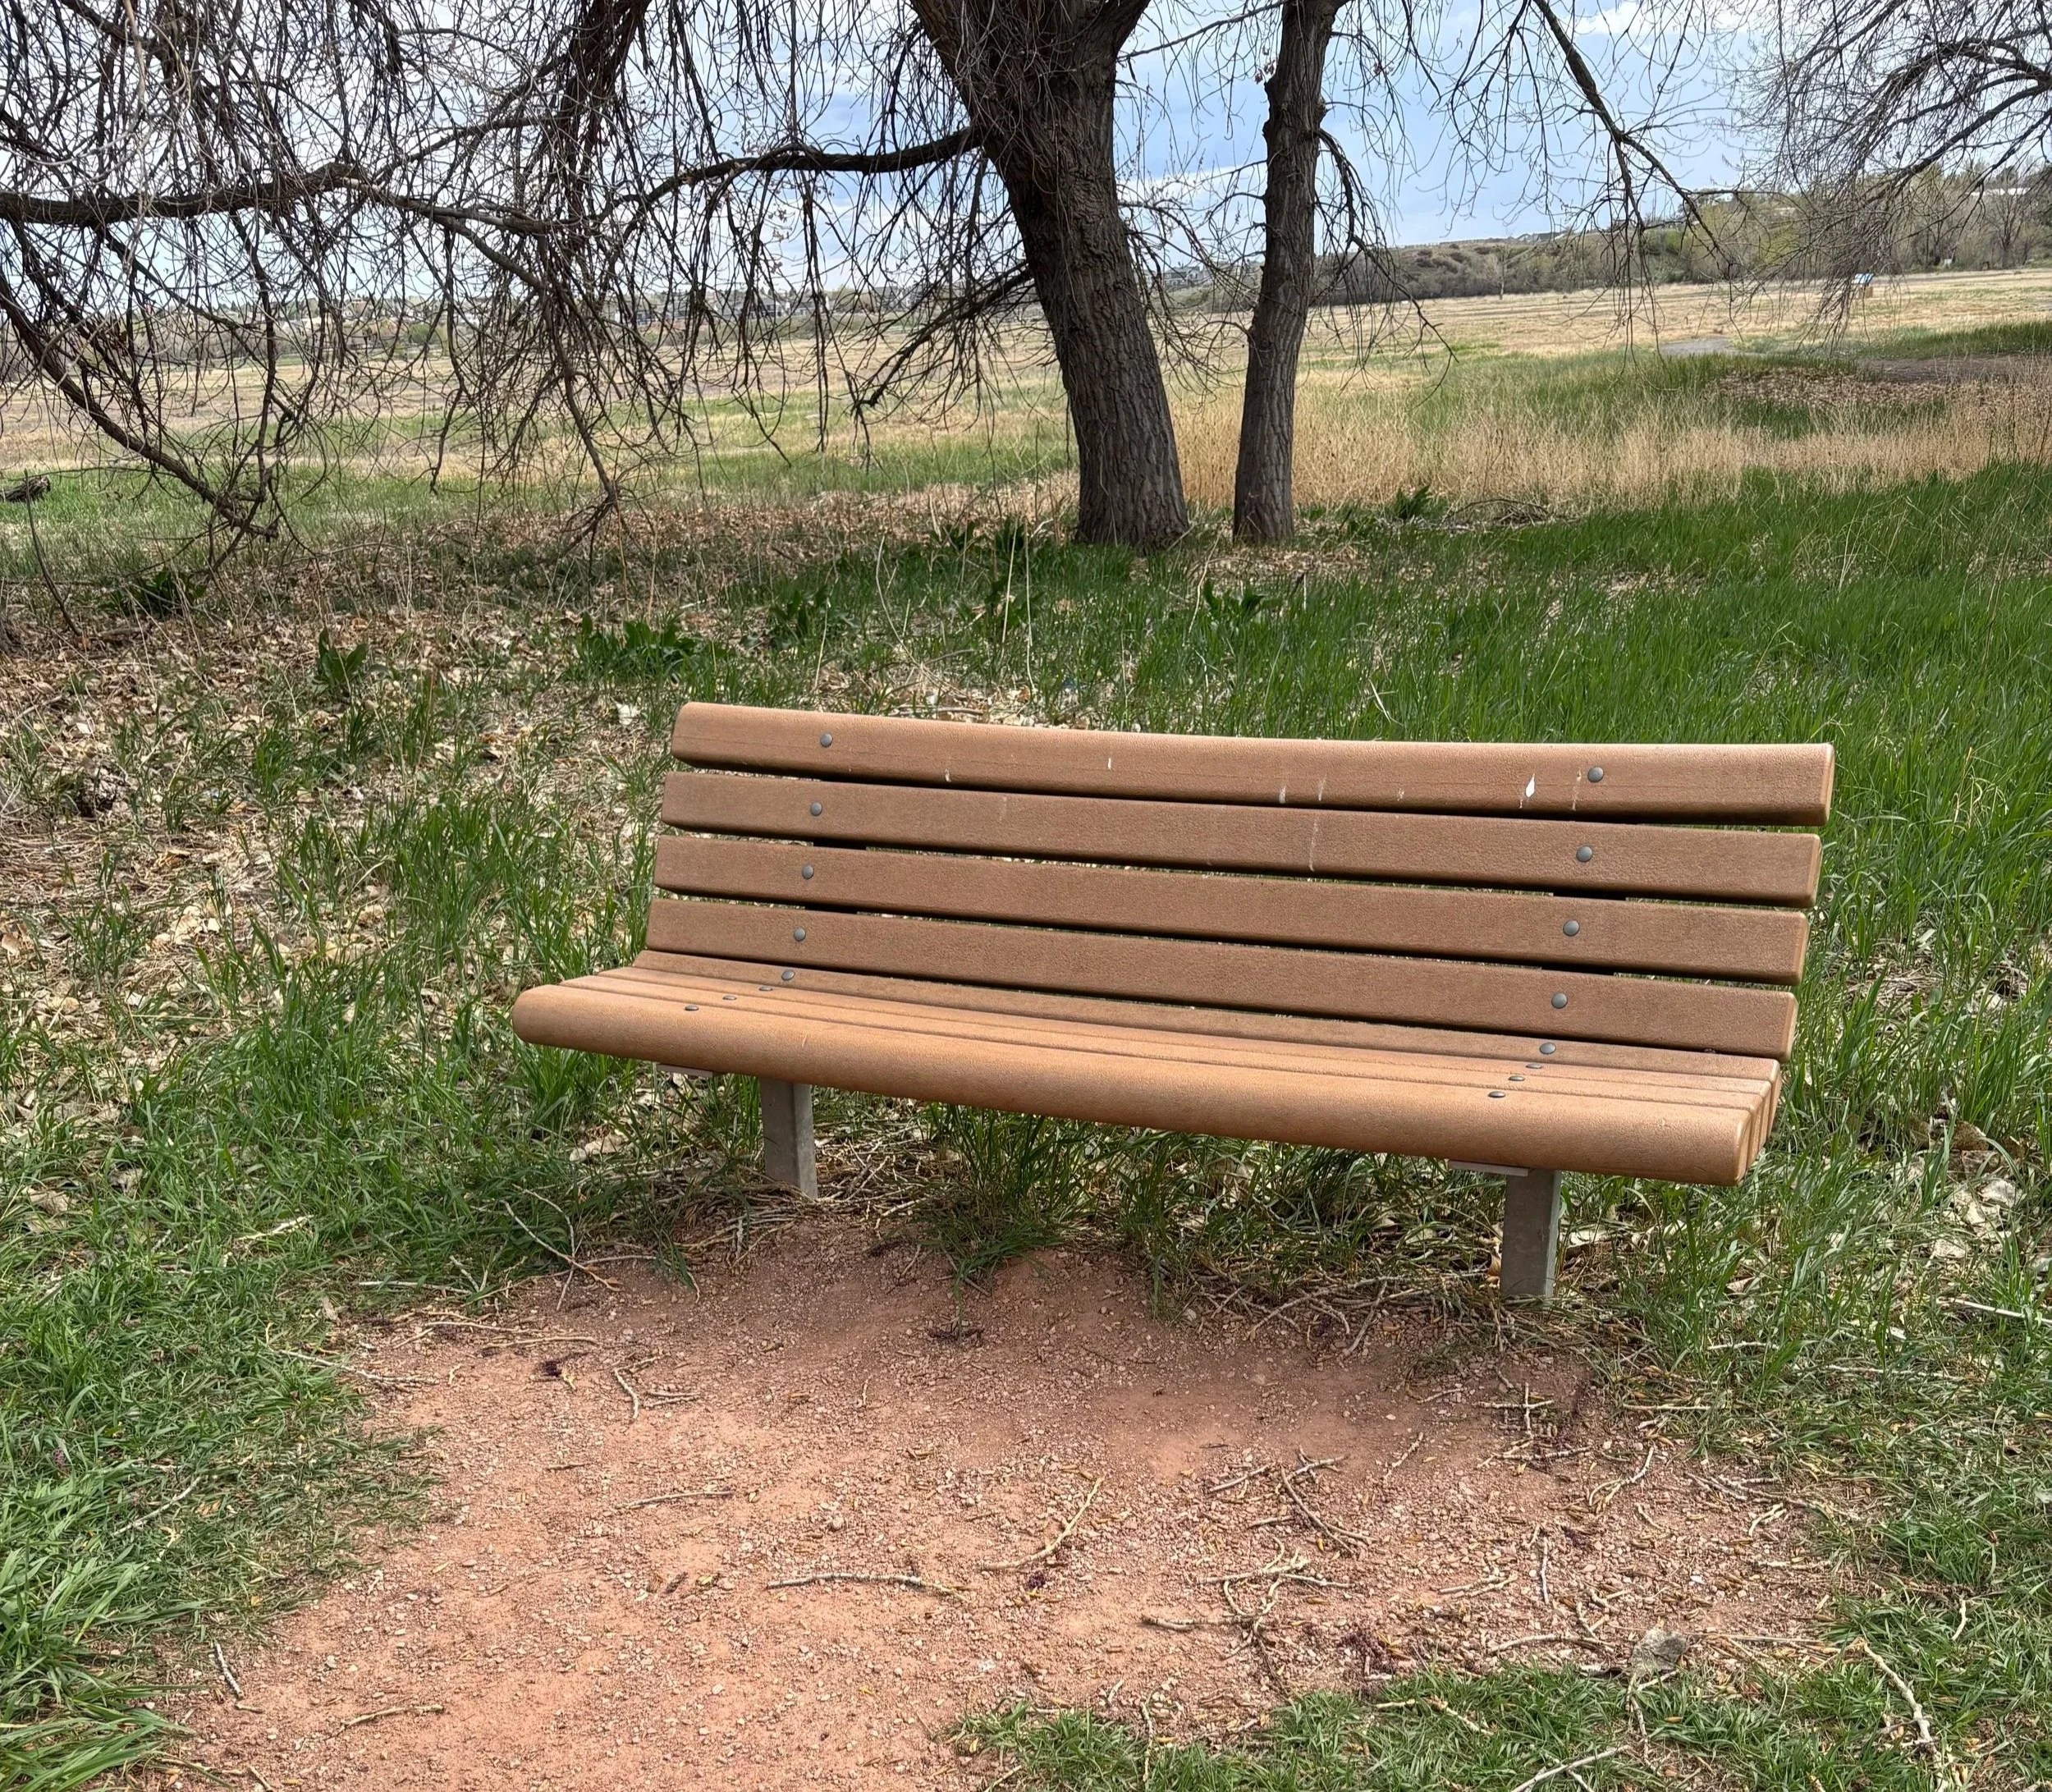
This bench has a nice backrest and is easy to access of the trail, however it does not have a wheelchair spot on the side and has no armrests
Spacing: How Far Apart Should Benches Be?
We all know the feeling of wondering “Are we there yet?” after a steep climb. Best practice is to place benches every 200 to 300 feet on steep or challenging trails, and every 1,000 feet or so on easier terrain. That may sound like a lot, but remember: not everyone is zipping up the trail like a mountain goat. Frequent benches give people with mobility challenges, older adults, and families a chance to rest without turning the hike into a survival test.

The Style That Works Best
Not all benches are created equal. Those fancy, artsy benches that look like modern sculptures? Beautiful in a park downtown, but not so practical on a trail. Out here, we want:
Backrests and armrests – because sometimes you need a little help standing up again. I wouldn’t recommend armrests on both sides however because getting on the bench can be more challenging for a wheelchair user with the armrest in the way. Therefore I recommend only one armrest on a side or the middle of the bench.
Comfortable seat height – about 17 to 19 inches off the ground works for most people. Too low, and you’re doing an accidental leg workout. Too high, and your feet dangle like a kid’s.
Smooth Edges – think weather-resistant wood that is heat resistant with rounded corners. Nobody wants a splinter, large gash on their leg, or a burn when trying to relax and watch the sunset.
Easy to Access - make sure that the benches have an access path that is wide enough for an assistive device (at least 3’ wide) and the drop off from the trail to the access route is smooth.
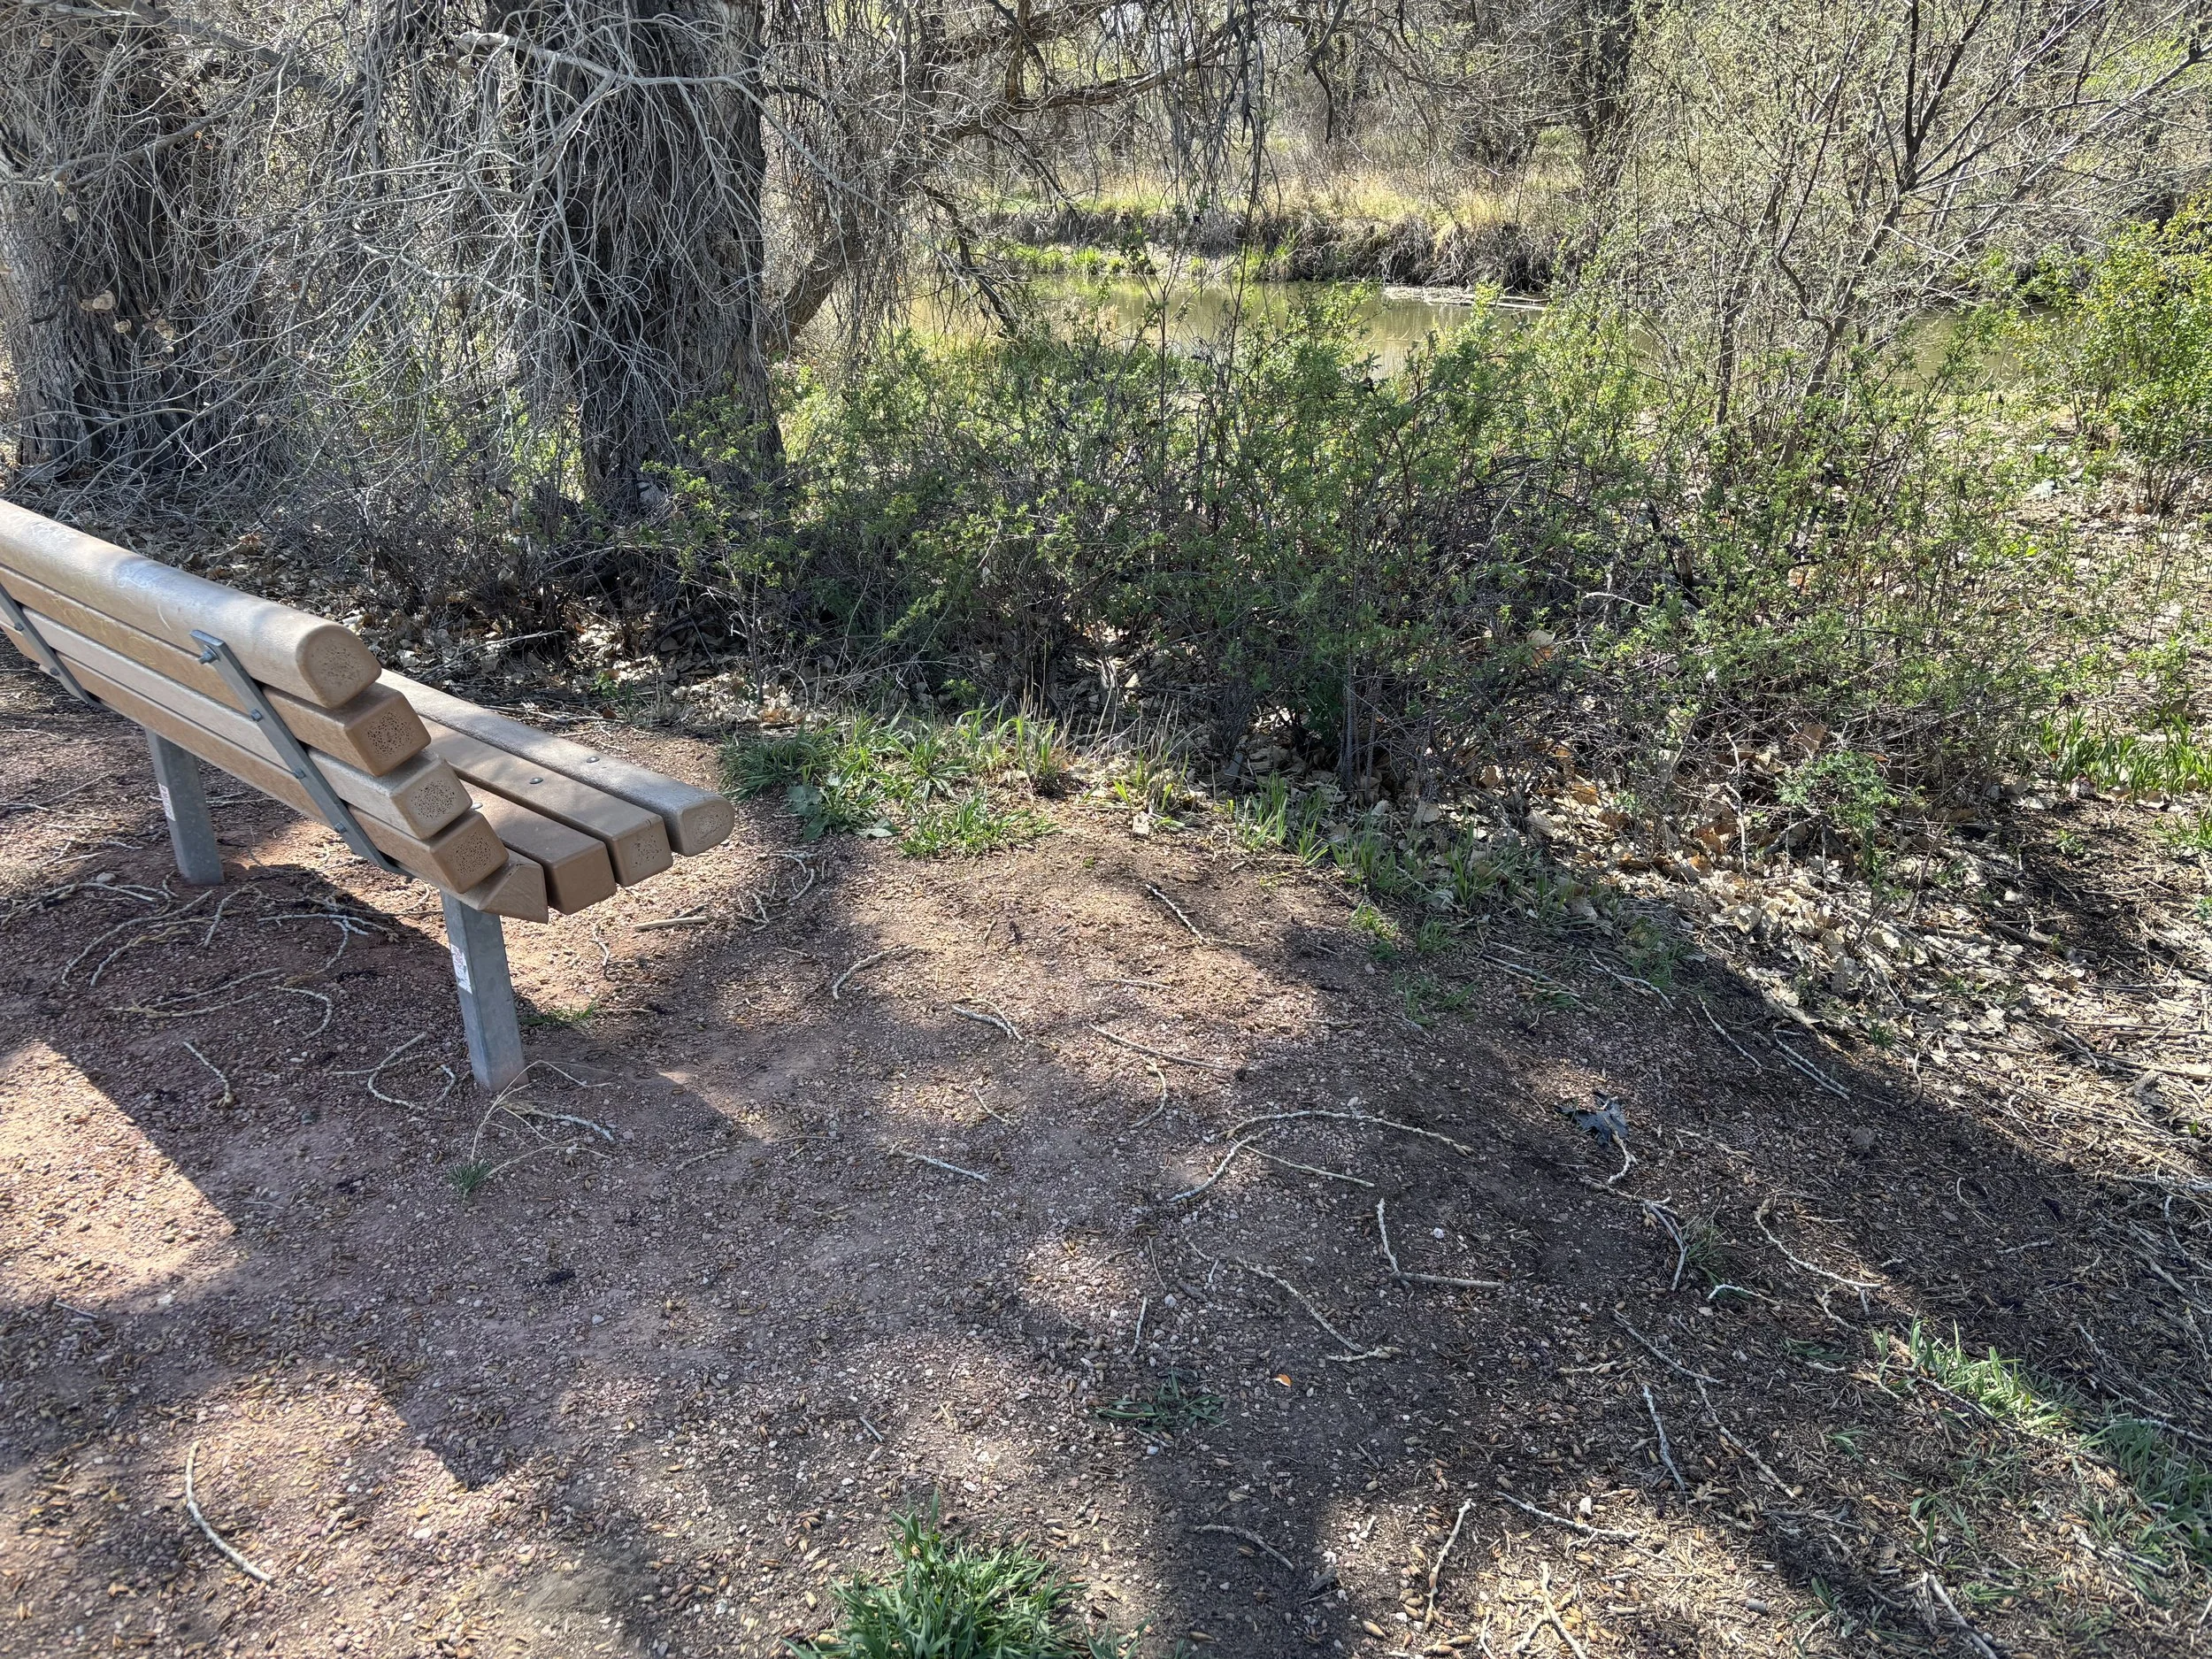
This bench needs some maintenance as the wheelchair spot has erosion damage and is now a hill that can not be used.
Flat Space Matters
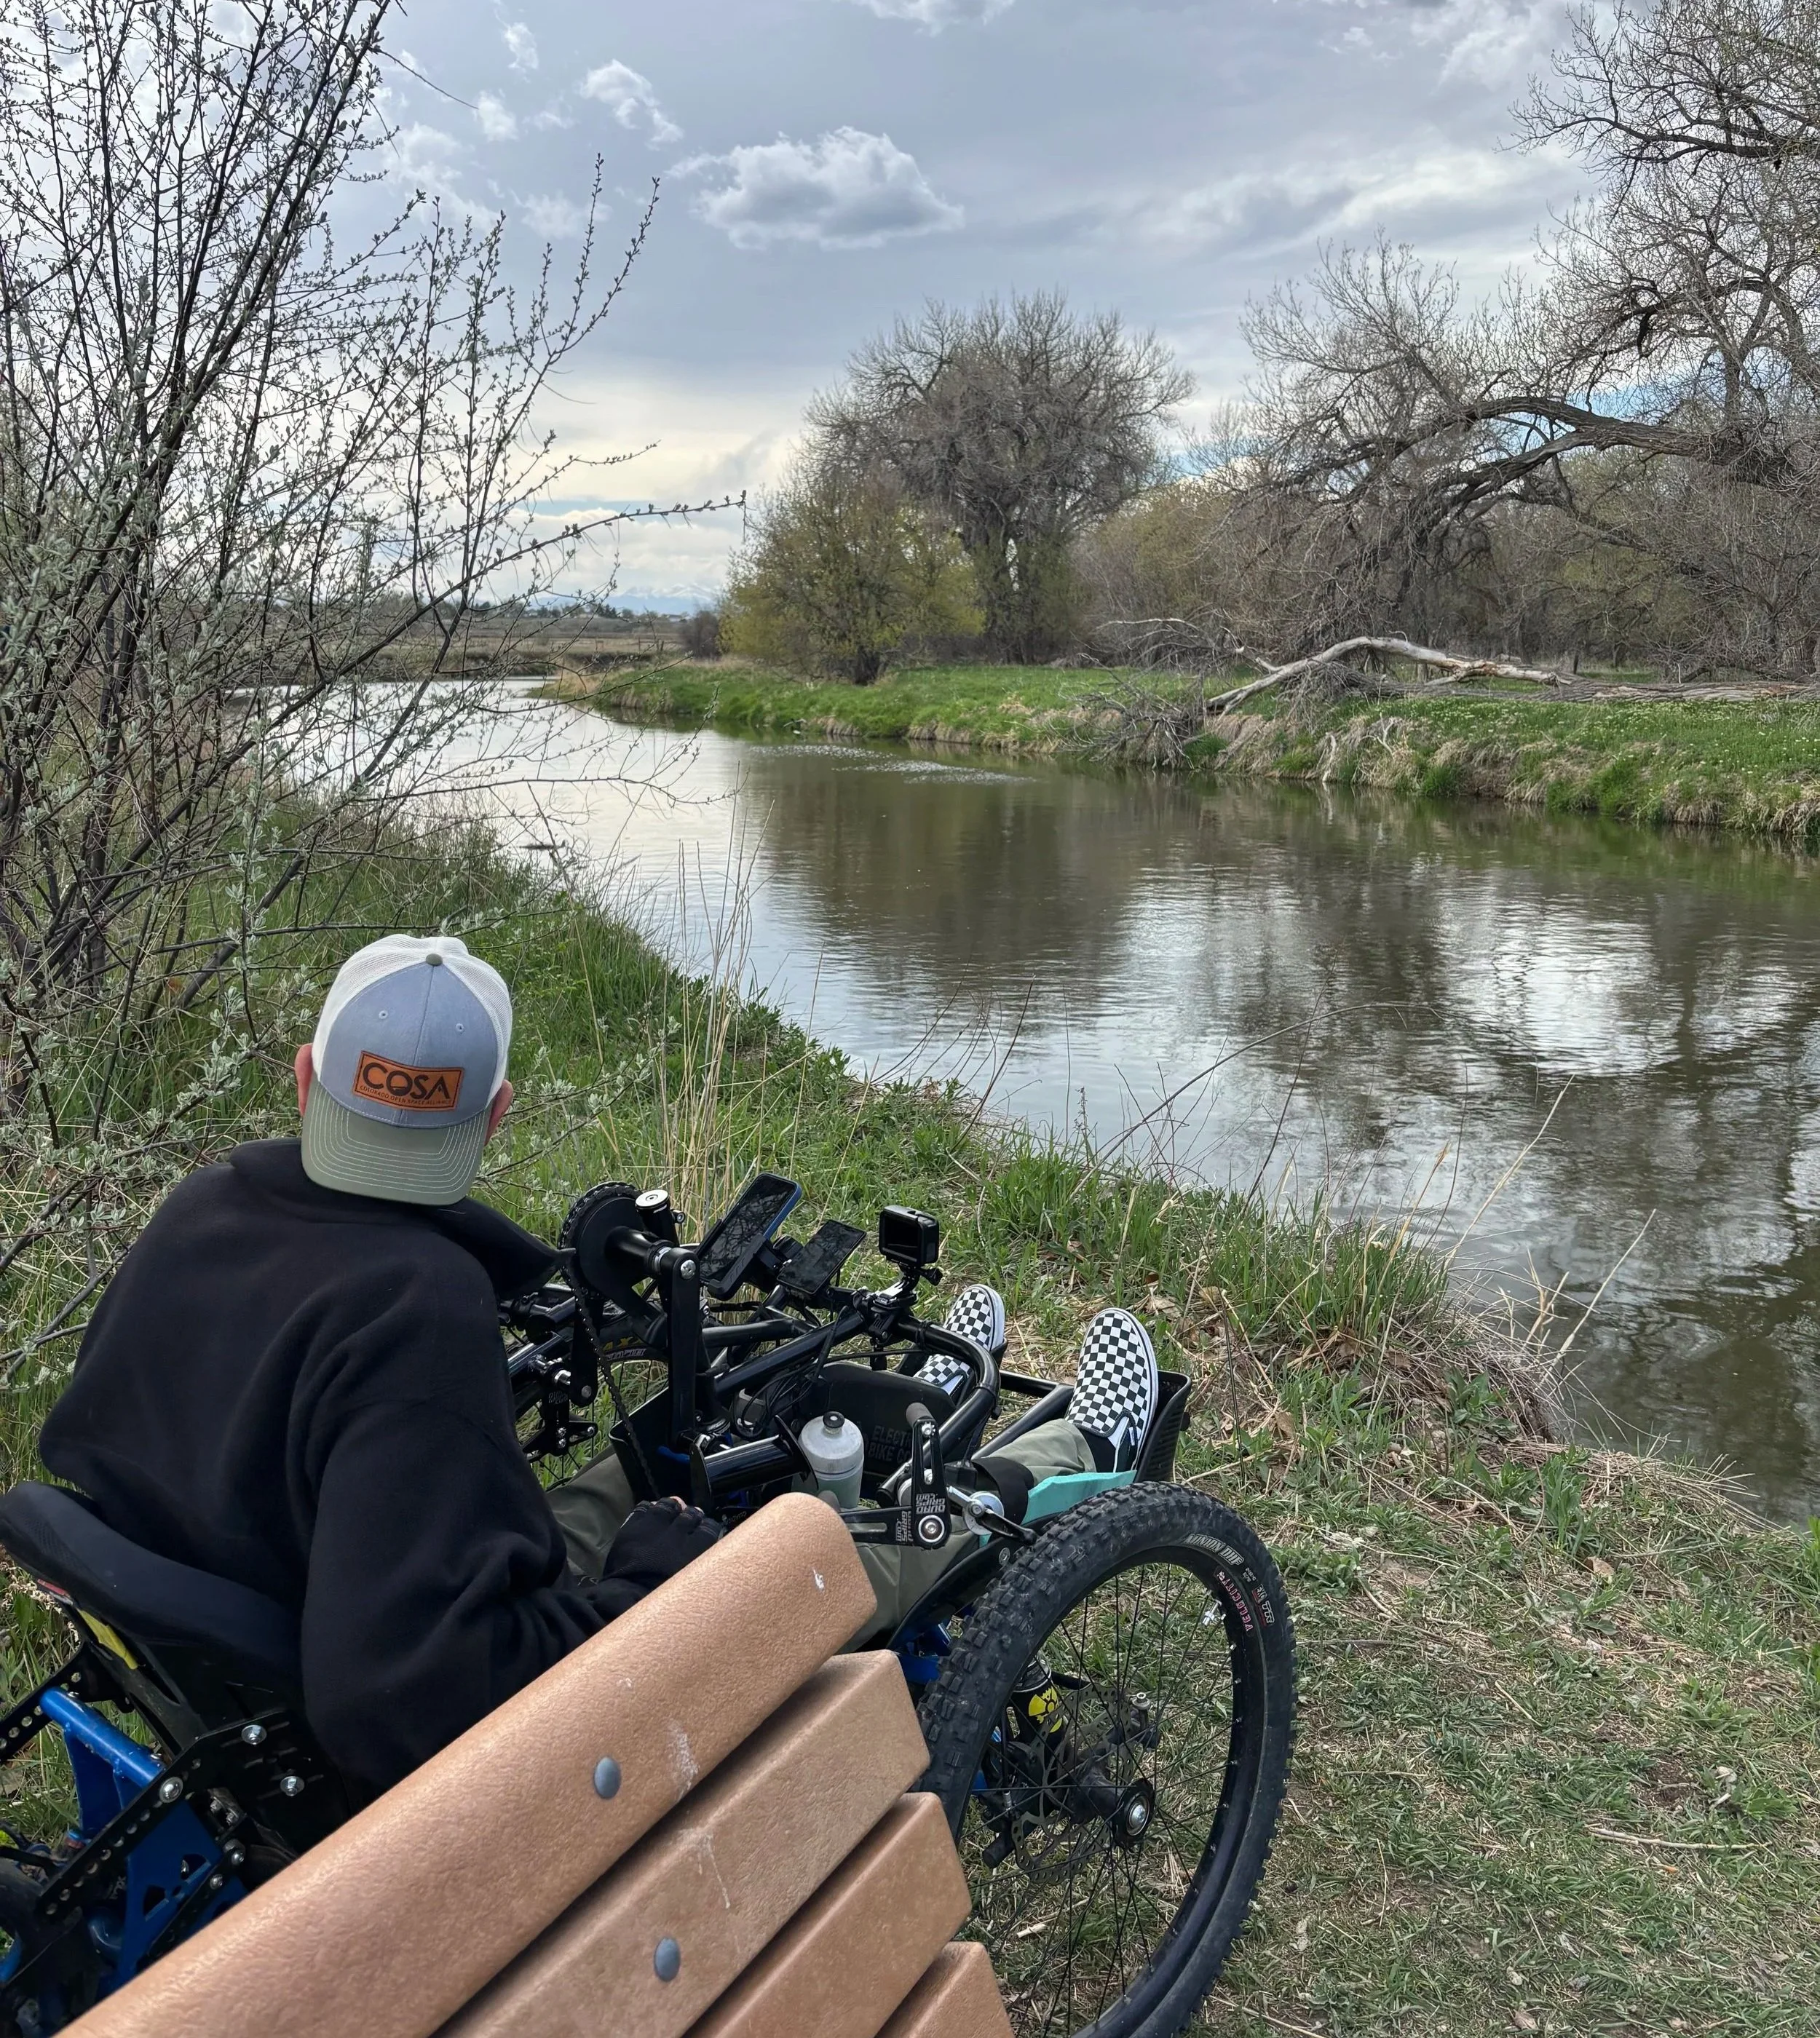
This one is huge: next to every bench, there should be a flat, firm spot where a wheelchair can pull up. That way, a wheelchair user doesn’t have to sit awkwardly behind the bench or in the weeds while their family relaxes. It creates real togetherness—everyone gets to sit side by side and enjoy the break.
Location, Location, Location
Benches should be more than pit stops. Place them in interesting spots—overlooks, shady groves, near water, or by interpretive signs. Shade is also key. Many people with disabilities have difficulty with temperature regulation, and therefore rests in the sun will not work for them. A bench in full sun on a hot day becomes less of a rest stop and more of a frying pan.
Why It Matters
When benches are thoughtfully designed and placed, they turn trails into more welcoming spaces. They send the message: “We thought of you, and we want you here.” That’s what accessibility really is—it’s not about checking a box, it’s about making sure everyone can enjoy the outdoors at their own pace.
So the next time you take a break on a trail bench, notice the details: the backrest, the shade, the view. If all those things are there, someone did their homework—and hikers of all abilities will thank them.